
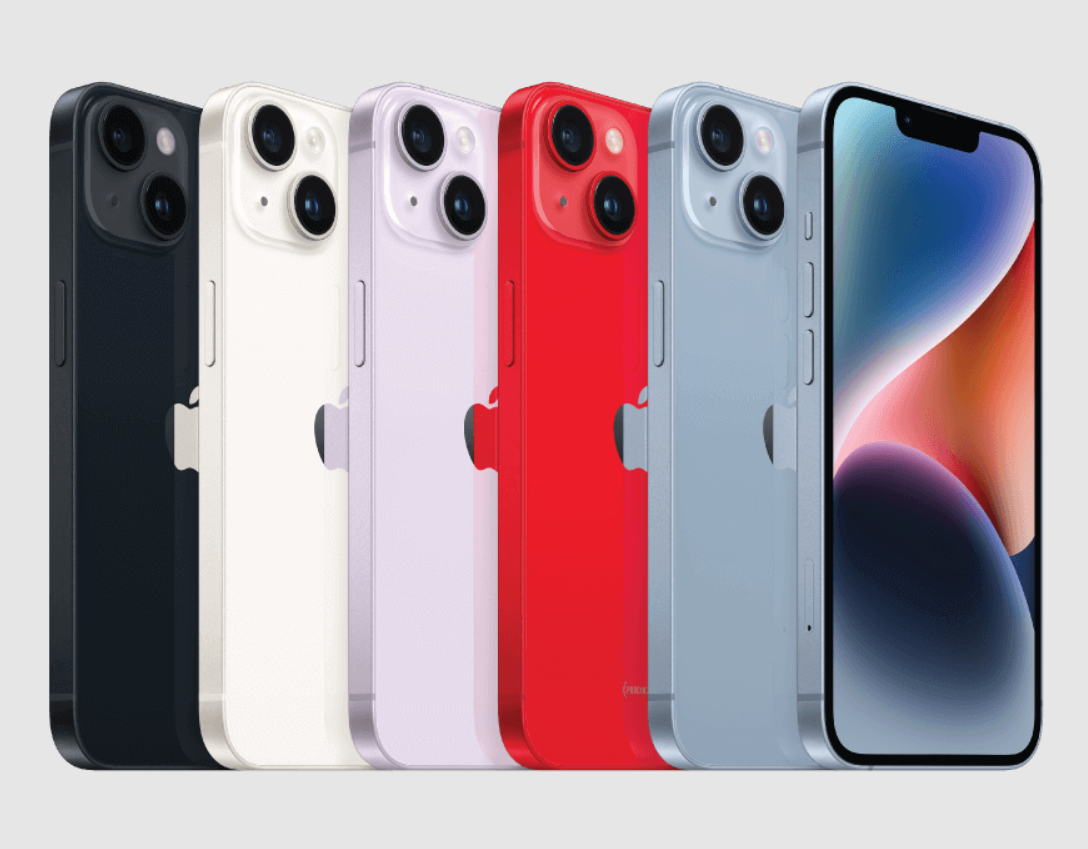
A cracked iPhone 14 screen is one of the most common repair jobs in the UK right now, and for good reason. The phone launched back in September 2022 and has stayed in daily use across millions of households, which means drops, scratches, and dead-pixel displays are showing up on workbenches and kitchen tables in equal measure. The good news is that fixing it is far more straightforward and far cheaper than most people assume once you understand the screen types available and what the job actually involves.
This guide walks through everything you need to know before replacing an iPhone 14 screen, whether you're a repair technician sourcing parts for a customer or a confident DIYer tackling the job at home.
Signs Your iPhone 14 Screen Needs Replacing
Not every display issue requires a full replacement, but several symptoms make it the only realistic fix. A visibly cracked or shattered front glass is the obvious one, but touch problems are just as common. If certain areas of the screen stop responding, or the whole display ignores taps intermittently, the digitizer layer underneath the glass has likely been damaged.
Dead pixels, coloured lines, or sections of the screen that stay black even when the rest of the screen lights up point to a damaged LCD or OLED panel rather than just the glass. Flickering, dimming that won't correct itself, or a backlight that's failed entirely are also signs that the panel itself needs swapping out, not just the outer glass.
Liquid exposure can cause similar symptoms days or weeks after the spill, so a screen that develops faults without any obvious drop is still worth investigating. Pressure damage from sitting on a phone or squeezing it into a tight pocket can also crack the inner layers without breaking the outer glass at all, which is why a phone that looks fine but behaves oddly shouldn't be dismissed as a software glitch before the display itself has been ruled out.
In every one of these cases, a full-screen assembly replacement resolves the issue far more reliably than attempting to repair the glass alone, since the glass, digitizer, and display panel on an iPhone 14 are bonded together as a single unit rather than separate, individually replaceable layers.
LCD vs OLED: Choosing the Right iPhone 14 Screen
The iPhone 14 shipped with a 6.1-inch Super Retina XDR OLED display from Apple, but the aftermarket repair world offers more flexibility, and it pays to understand the difference before buying a replacement.
LCD digitizer screens are the budget-friendly option. They restore full functionality, including a sharp 1170 x 2532 resolution and accurate touch response, at a noticeably lower price point than OLED alternatives. They're a sensible choice when a customer wants their phone working again without spending close to the original screen's value, or when a repair shop needs to keep margins healthy on lower-cost jobs.
OLED replacement screens get closer to the original factory display, with deeper blacks, richer contrast, and the kind of colour accuracy that is close to matching Apple's panel. These cost more, but they're the right call when a customer specifically wants the original viewing experience back, particularly on Pro and Pro Max models where the screen quality is a bigger part of what they paid for.
Neither option is "wrong." The right screen depends on budget, the model in question, and how fussy the end user is about colour accuracy versus simply having a working phone again.
It's also worth checking exactly what resolution and panel type a listing includes before buying, since "compatible" parts vary in quality between suppliers. A properly specified iPhone 14 LCD digitizer should match the original 1170 x 2532 resolution and include the full touch layer bonded to the glass, rather than a glass-only kit that leaves the buyer needing a second part to finish the job.
Also Read:
iPhone 16 Plus Case with Screen Protector & Stand
What's Actually Involved in the Replacement
Replacing an iPhone 14 screen follows a fairly consistent process, though the Pro and Pro Max models have a slightly different internal layout that adds a battery-disconnect step for safety.
The phone is powered down completely, then the two pentalobe screws near the charging port are removed. Controlled heat is applied along the edges to soften the adhesive holding the screen to the frame, and a suction tool combined with a thin opening pick gradually separates the display from the chassis. Once there's enough of a gap, the screen lifts away, and the small flex cables connecting it to the logic board are carefully disconnected before the new screen assembly is fitted and reconnected.
After installation, fresh adhesive strips are needed to properly reseal the screen against the frame, which is part of why DIY repairers should always order new adhesive alongside the screen itself rather than reusing the old strips. On the latest iOS versions, Apple's Repair Assistant can also be used afterwards to register the part and help recalibrate features like True Tone, where supported.
DIY Repair or Professional Service?
This is the decision most people land on once they've worked out what's actually wrong with their screen. Both routes are valid, and the right one depends on confidence, tools, and how much the phone matters to daily life in the meantime.
DIY repair makes sense if:
- You're comfortable working with small screws, flex cables, and adhesive
- You already have, or are willing to buy, the right tools (pentalobe screwdriver, suction cup, opening picks, tweezers)
- You want to save on labour costs and don't mind the phone being out of action while you work
- You're a repair technician fitting parts as part of your regular trade
Professional repair makes sense if:
- You rely on the phone constantly and can't risk extended downtime
- You're not confident handling the Face ID or proximity sensor cables, which are delicate and easily damaged
- The phone is still under any form of warranty that DIY work would void
Either way, the part quality matters more than who fits it. A premium screen fitted by a careful DIY repairer will outlast a poor-quality screen fitted by a professional. That's where sourcing genuinely tested components becomes the deciding factor in how long the repair actually lasts.
Tools You'll Need for a DIY Screen Swap
A handful of inexpensive tools makes the difference between a clean repair and a frustrating one:
- 0.8mm pentalobe screwdriver – for the two screws beside the charging port
- Suction cup tool – to create the initial lifting gap
- Plastic opening picks – to separate the adhesive without scratching the frame
- Tweezers – for handling small screws and connectors
- Heat source (hair dryer or heat gun) – to soften adhesive before lifting
- New adhesive strips – to properly reseal the replacement screen
- SIM eject tool – useful for general disassembly access
Skipping the adhesive strips is the most common DIY mistake. Reusing old adhesive or skipping it altogether leaves the screen sitting loose in the frame and prone to dust or moisture ingress later on.
Also Read:
Sell iPhone 16 Pro Max Online for Cash
Common Mistakes to Avoid
A few errors come up again and again, whether it's a first-time DIY repair or a rushed job on a busy workbench.
Applying too much force when separating the screen is the biggest one. The adhesive is genuinely strong, and impatience leads to bent frames or torn flex cables. Heating the edges properly before lifting solves most of this without any extra force needed.
Disconnecting the battery is also worth doing on Pro and Pro Max models, even though it's technically optional on the standard iPhone 14 and 14 Plus due to their separate internal layout. It's a five-minute precaution against a short circuit that can otherwise turn a screen job into a much bigger repair.
Finally, buying a screen without checking what's actually included, full assembly versus glass-only, can lead to confusion mid-repair. A complete LCD or OLED display digitizer assembly includes the glass, touch layer, and panel all bonded together, which is what nearly every iPhone 14 repair actually requires.
Sourcing Quality iPhone 14 Screen Parts in the UK
Part quality is the single biggest factor in how long a screen replacement lasts. A cheap, untested panel might work fine for a few weeks before touch sensitivity drops off or the backlight starts flickering, leading to a second repair and an unhappy customer.
E-Tech61 supplies brand new, fully tested Apple iPhone 14 replacement parts from its Manchester base, including LCD digitizer screens, premium OLED displays, and the equivalent parts for iPhone 14 Plus, Pro, and Pro Max. Every screen is tested before dispatch, the business is VAT registered, and orders placed on working days ship same-day across the UK, which matters when a customer is waiting on a working phone.
The same collection covers the rest of what an iPhone 14 repair typically needs beyond the screen itself: replacement batteries for phones suffering rapid drain or random shutdowns, USB-C to Lightning charging cables, and protective cases to prevent the next drop from causing the same problem twice. Sourcing everything from one tested, UK-stocked supplier also simplifies returns and warranty queries if anything does need to go back, backed by a 30-day return policy on unused parts.
Also Read:
Best iPhone 16 Pro Max Case for Daily Protection
Frequently Asked Questions
Will True Tone still work after a screen replacement?
On older iOS versions, True Tone and auto-brightness were disabled after most screen swaps, including with genuine Apple parts. On current iOS releases, Apple's Repair Assistant can recalibrate these features after the part is registered, though results can vary by screen type and iOS version.
Does Face ID still work after replacing the screen?
Yes, in the vast majority of cases, provided the Face ID sensor cables aren't disturbed or damaged during the repair. These cables sit near the top of the display assembly and need careful handling rather than any special recalibration step.
How long does an iPhone 14 screen replacement take?
A technician comfortable with the process typically completes it in 30 to 45 minutes. First-time DIY repairers should budget closer to 90 minutes to allow for careful heating, lifting, and reassembly without rushing.
Is it worth repairing an iPhone 14 screen or just upgrading the phone?
Given that a quality replacement screen costs a fraction of a new handset, and the iPhone 14 still runs comfortably on the A15 Bionic chip, repairing is almost always the better financial decision unless other components have also failed.
Final Thoughts
An iPhone 14 with a cracked or faulty screen doesn't need to mean a trip to the Apple Store or a hefty repair bill. Understanding the difference between LCD and OLED options, knowing what the job involves, and sourcing a properly tested replacement part puts the repair well within reach, whether that's in a professional workshop or on a kitchen table with the right tools to hand.
Browse E-Tech61's full range of iPhone 14 parts, including LCD and OLED screens, batteries, charging cables, and protective accessories, all tested before dispatch and shipped same-day from our Manchester warehouse.
Share:
Cheap iPhone 13 Pro Refurbished: Price Comparison & Tips
iPhone 16 Pro Screen Replacement: The Complete 2026 UK Guide