
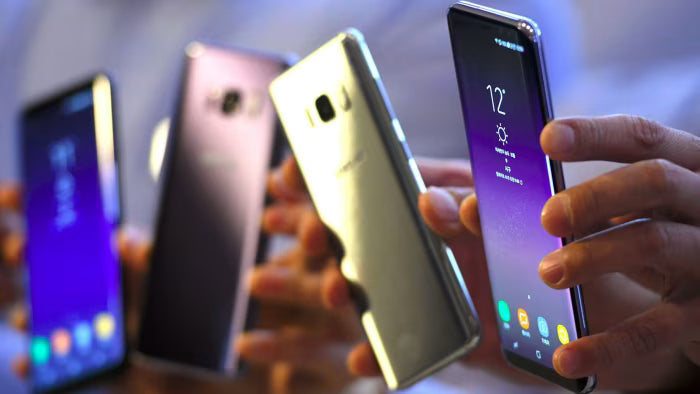
There is nothing more frustrating than picking up an important call and hearing absolutely nothing. No voice. No sound. Just silence on a phone that otherwise works perfectly fine. I went through this exact situation with my Samsung Galaxy S8 Plus about eight months into owning it and spent two days convinced the problem was with my network carrier before realising the issue was sitting right at the top of my phone the entire time.
The Galaxy S8 Plus Replacement Earpiece Speaker is one of those repairs that sounds intimidating until you actually understand what is involved. Once you do, it becomes one of the more satisfying fixes you can perform on an ageing Samsung device that still has plenty of life left in it.
This guide walks through everything honestly. The symptoms. The diagnosis. The tools. The process. And where to source parts that actually match the quality your phone deserves.
What Exactly Is the Earpiece Speaker and Why Does It Fail
The earpiece speaker is the small rectangular component sitting at the top of your Galaxy S8 Plus display. It is the speaker you press against your ear during phone calls. Not the loudspeaker at the bottom used for music and speakerphone. The small, quiet one at the top that handles private call audio exclusively.
This component fails for several reasons that have nothing to do with careless ownership.
Dust and debris accumulate inside the earpiece grille over months of use. Fabric fibres from pockets and bags, skin cells, and environmental particles pack into the narrow mesh and physically block sound transmission. The speaker technically works but cannot project audio through the blockage effectively.
Moisture exposure causes corrosion on the speaker contacts even on devices marketed as water resistant. The Galaxy S8 Plus carries an IP68 rating but repeated exposure to humidity, sweat during workouts, and occasional splashes degrades internal components over time in ways that cumulative rather than single incident damage produces.
Physical impact damage from drops affects the delicate speaker diaphragm inside the component. The earpiece speaker sits near the top edge of the phone, which absorbs impact when devices land face down or top first.
Component aging simply happens. Mechanical speakers contain moving parts that wear through millions of vibration cycles across years of use.
Symptoms That Confirm You Need a Galaxy S8 Plus Replacement Earpiece Speaker
Before ordering parts or booking repairs, confirming the earpiece speaker is genuinely the problem saves time and money. Several symptoms clearly indicate earpiece failure rather than software issues or other hardware problems.
Call audio is completely absent despite the call connecting normally. The person on the other end hears you clearly. You hear nothing from the earpiece. Switching to speakerphone restores audio immediately. This pattern points directly at earpiece speaker failure.
Call audio exists but sounds muffled, distorted, or significantly quieter than it used to be. Voices sound like they are coming through thick fabric. Consonants blur together making conversation difficult. You find yourself asking people to repeat themselves constantly.
Audio cuts in and out during calls. Sometimes clear, sometimes gone. This intermittent behaviour often indicates a loose connection at the speaker contacts rather than complete component failure.
The earpiece produces crackling or buzzing sounds during calls. Distortion during audio reproduction suggests physical damage to the speaker diaphragm or debris interfering with diaphragm movement.
Here is a quick way to test before assuming the worst. Go to the Samsung dialler and enter the code *#0*# to access the device diagnostic menu. Select Speaker and run the audio test. If the earpiece produces no sound or heavily distorted sound during the test while your loudspeaker functions normally, you have confirmed hardware failure rather than a software or network issue.
Also Read:
Samsung Galaxy S21 Ultra Cases
Try These Steps Before Replacing Anything
I always tell people to eliminate the simple possibilities before committing to a repair. Sometimes the fix is embarrassingly straightforward.
Clean the earpiece grille thoroughly first. Use a soft bristle toothbrush to brush across the mesh in gentle circular motions. Follow this with short bursts of compressed air directed at an angle across the grille rather than directly into it. Pushing debris deeper defeats the purpose. You want to dislodge and redirect material outward. Many Galaxy S8 Plus earpiece problems resolve completely at this stage.
Check your call volume during an active call using the physical volume buttons. Samsung devices occasionally reset media volume and call volume independently. It sounds obvious but reduced call volume settings have fooled many people into thinking their earpiece failed.
Restart the device and test again. Temporary software glitches occasionally affect audio routing and a restart clears them reliably.
Check for third party apps interfering with audio. Recent app installations sometimes conflict with call audio handling. Boot into Safe Mode by holding the power button, pressing and holding Power Off on screen until Safe Mode appears, then confirming. Safe Mode disables third party apps. If call audio returns in Safe Mode, a recently installed app is the culprit rather than hardware failure.
If none of these steps restore earpiece audio, you are dealing with genuine hardware failure and a Galaxy S8 Plus Replacement Earpiece Speaker is the solution.
Tools You Need for the Repair
Attempting this repair without proper tools damages components that proper tools protect easily. Do not improvise with kitchen implements or random screwdrivers.
You need a heat gun or hairdryer for softening display adhesive. A suction cup for initial screen separation. A set of plastic opening picks for working around the screen perimeter. A Phillips PH00 screwdriver for internal components. A Torx T5 screwdriver for specific internal screws depending on your device variant. Tweezers with fine tips for connector manipulation. Isopropyl alcohol at 90% concentration or higher for adhesive cleaning. Replacement adhesive strips for resealing after repair.
Complete tool kits designed specifically for Samsung repair are available affordably and provide everything needed in one purchase. E-Tech61 stocks repair accessories and components that make sourcing both parts and tools straightforward from a single UK supplier.
Also Read:
Samsung A12 LCD without Frame Replacement
Step by Step Galaxy S8 Plus Earpiece Speaker Replacement
Read through the entire process before beginning. Understanding what comes next prevents hesitation at critical moments.
Step One: Power Down Completely
Hold the power button and select Power Off. Wait for the device to shut down fully. Never work on powered electronics. Remove your Galaxy S8 Plus Dual Sim Card Tray using the ejection tool before proceeding to prevent debris entering the SIM slot during repair.
Step Two: Soften the Display Adhesive
The Galaxy S8 Plus display attaches to the frame with adhesive that must be softened before separation. Apply gentle heat along all four edges using a heat gun on low setting or a hairdryer held several centimetres from the surface. Thirty to forty five seconds per edge is sufficient. The adhesive softens rather than melts. Overheating damages the display and battery.
Step Three: Begin Screen Separation
Apply the suction cup near the bottom edge of the display. Pull upward with moderate, steady pressure while inserting a plastic opening pick into the gap created. Do not use metal tools here. Metal scratches frames and cuts cables. Work the pick slowly around the bottom and side edges. The Galaxy S8 Plus has curved display edges requiring particular care. Move incrementally rather than forcing large sections.
Step Four: Open the Device Carefully
The display connects to the motherboard via cables running along the right side. Open the display like a book from the left edge, keeping the right side as the hinge. Do not pull the screen away from the body without confirming cable slack allows the movement. Prop the display open at a shallow angle using something non-conductive.
Step Five: Disconnect the Battery
Locate the battery connector on the motherboard and disconnect it before any further work. This step is non-negotiable. Working on internal components with the battery connected risks short circuits and component damage.
Step Six: Remove the Earpiece Speaker
The earpiece speaker sits near the top of the device beneath a small bracket secured with screws. Remove the bracket screws using the appropriate screwdriver. Lift the bracket away carefully. The earpiece speaker typically sits in a housing that lifts out directly or connects via small ribbon cable depending on the specific Galaxy S8 Plus production variant.
Note the exact orientation and routing before removing the old component. A photograph taken at this stage prevents reassembly confusion later.
Step Seven: Install the Replacement Speaker
Place the new Galaxy S8 Plus Replacement Earpiece Speaker in the same position and orientation as the original. Reconnect any ribbon cable connector with gentle, even pressure until it seats fully. Replace the bracket and secure the screws without overtightening. Stripped screws in plastic housings cause significant reassembly problems.
Step Eight: Test Before Sealing
Reconnect the battery connector. Carefully fold the display back toward the body without pressing it into the adhesive yet. Power on the device and make a test call or run the diagnostic test using *#0*# again. Confirm the earpiece produces clear audio before committing to final reassembly. Discovering a fault after sealing means reopening everything.
Step Nine: Final Reassembly
Power down again. Clean old adhesive residue from the frame perimeter using isopropyl alcohol on a cotton applicator. Apply fresh adhesive strips to the frame. Fold the display back into position and apply firm, even pressure around all edges for sixty seconds. Allow the adhesive to cure for thirty minutes before normal use.
Sourcing Quality Replacement Parts
This is where many otherwise competent repairs fail. The earpiece speaker quality determines how long the repair lasts and how well call audio performs afterward.
Generic components manufactured without reference to original specifications deliver inconsistent audio quality and shorter service life. The price difference between quality and cheap components is rarely significant enough to justify the performance and reliability compromise.
E-Tech61 stocks Samsung Galaxy S8 Plus repair components including the Galaxy S8 Plus Replacement Earpiece Speaker with specifications matching original equipment requirements. As a UK based supplier, ordering is straightforward, delivery reaches UK addresses reliably, and accountability exists if products do not meet expectations.
While sourcing your earpiece speaker, consider whether other components need attention simultaneously. The Samsung Galaxy S8 Plus Charging Port accumulates wear and debris over years of daily use. If charging has become intermittent or the cable sits loosely in the port, combining that repair with your earpiece replacement saves the effort of reopening the device separately later.
Protecting Your Galaxy S8 Plus After Repair
Completing a successful earpiece replacement deserves proper follow through with protection that prevents future damage.
The Samsung Galaxy S8 Plus Shockproof Silicone Cover provides impact absorption that protects both the display and the internal components you just carefully repaired. Silicone cases absorb and distribute impact energy rather than transmitting it directly to device internals. The earpiece area at the top of the phone receives specific protection from the raised lip that quality silicone cases provide around the display perimeter.
A tempered glass screen protector adds another layer of protection for the display while keeping the visual experience close to the original unprotected quality. Apply it carefully following the included instructions and take your time aligning it before pressing down.
The Galaxy S8 Plus Dual Sim Card Tray you removed during repair should reseat firmly with the ejection tool. Confirm it sits flush with the frame and the seal around it appears intact before returning to normal use involving any moisture exposure.
Is This Repair Worth Doing on an Older Device
Honestly? Usually yes.
The Galaxy S8 Plus remains a capable device for everyday tasks. Calls, messaging, social media, navigation, photography for casual use. The hardware outside the earpiece speaker works reliably for most owners years after purchase.
The cost of a quality Galaxy S8 Plus Replacement Earpiece Speaker sits well below any comparable replacement device. Even adding professional installation labour costs, repair economics favour fixing over replacing in most situations where the rest of the phone functions normally.
The repair also avoids the environmental cost of discarding a device that needs a component costing a fraction of the phone's replacement value. Right to repair matters practically as well as philosophically.
If your Galaxy S8 Plus has multiple simultaneous failures across several components, the calculation shifts. But for isolated earpiece failure on an otherwise healthy device, repair is the clear smart choice.
Also Read:
Samsung Galaxy Tab S8 Ultra Replacement Battery
Frequently Asked Questions
Why is my Galaxy S8 Plus earpiece not working during calls?
The most common causes are debris blockage, moisture corrosion, physical impact damage, or component aging. Clean the grille thoroughly before assuming hardware failure.
How much does it cost to replace the earpiece speaker on Galaxy S8 Plus?
Quality replacement components from suppliers like E-Tech61 cost significantly less than professional repair shop pricing. DIY total cost including components and basic tools typically runs considerably below shop labour plus parts combined pricing.
Can I replace the Galaxy S8 Plus earpiece speaker myself?
Yes, with appropriate tools, patience, and careful attention to the process. The repair requires confidence with small components and precise connector handling but does not require professional training.
How long does Galaxy S8 Plus earpiece speaker replacement take?
Allow two to three hours for a first attempt without time pressure. Experienced repair technicians complete the job in under an hour. Rushing causes mistakes. Take the time the repair actually requires.
Will replacing the earpiece speaker fix call audio problems on Galaxy S8 Plus?
If hardware failure is confirmed through diagnostic testing, yes. Confirm the fault is hardware rather than software before purchasing components.
What tools do I need to replace the earpiece speaker on Galaxy S8 Plus?
Heat source, suction cup, plastic opening picks, Phillips PH00 screwdriver, Torx T5 screwdriver, fine tweezers, isopropyl alcohol, and replacement adhesive strips.
Share:
Samsung S8 Plus OLED Replacement With Frame Screen Cost
Apple iPhone 6S Plus Replacement Home Button Guide